Ever feel like you’re doing the same boring computer tasks over and over? Clicking through folders to hunt for a file. Manually skimming massive logs for one error message. Running the same backup script by hand every Friday.
What if you could get that time back?
The secret isn’t working harder—it’s working smarter, and it’s hiding in plain sight: your Linux terminal. Forget the slow, point-and-click grind. The command line is your shortcut to a more efficient day.
This isn’t about becoming a terminal wizard overnight. It’s about learning a few powerful time-saving Linux terminal commands that do the heavy lifting for you. Think of them as your digital shortcuts, automating the repetitive stuff so you can focus on what actually matters—whether that’s coding, managing servers, or just getting through your to-do list faster.
In this guide, we’re cutting straight to the chase. We’ve handpicked 10 essential commands that form the ultimate toolkit for efficiency. These are the Linux productivity hacks for developers and sysadmins that turn complex tasks into simple one-liners, saving you minutes here and hours there every single week.
Let’s swap the mouse-clicks for momentum and turn your terminal into your biggest time-saver.
Before You Begin: A Quick Primer
Let’s be real for a second—if you’re new to the terminal, it can look like digital hieroglyphics. All those strange words and symbols. Don’t let that scare you off. Every expert started right where you are, and the payoff for learning even the basics is massive.
Think of the terminal not as a old-school tool, but as a direct hotline to your computer’s brain. You’re telling it exactly what to do, without any slow menus or animations in the way. This is the foundation for all the time-saving Linux terminal commands we’re about to dive into.
Here’s all you need to know to get started:
The Prompt: That bit of text (user@host:~$) is just your computer waiting for instructions. Your cursor blinks after it, ready for your command.
The Basic Pattern: Most commands follow a simple logic: command -options arguments.
Example: ls -la /home breaks down to: List files, using the long list format all files, in the /home directory.
Your Two Best Friends (Right Now):
man: Short for manual. Stuck on a command? Type man ls to get the full, official guide for the ls command. (Press q to quit).
–help: A quicker, often simpler summary. Try ls –help.
You don’t need to memorize everything. The real Linux productivity hacks for developers come from knowing what’s possible and knowing how to look up the details when you need them.
Want to Go Beyond the Basics?
While this guide focuses on efficiency, true power users know that mastery involves security and deep system understanding. If you’re looking to level up from time-saving tricks to genuine command-line expertise—especially in areas like security testing, advanced privilege escalation, and in-depth system manipulation—check out our comprehensive resource: The Pentester’s Linux Library & Playbook. It’s the perfect next step once you’ve mastered these core productivity commands.
Alright, primer over. Let’s get to the good stuff that will actually change your workflow.
The 10 Time-Saving Command Champions
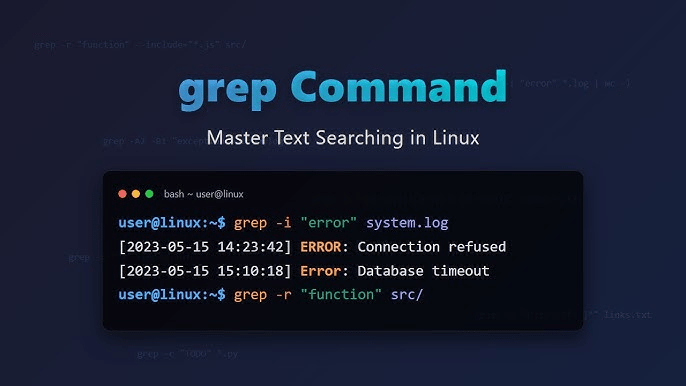
1. grep – The Ultimate Text Hunter
The Problem: You’re looking for a needle in a digital haystack. Maybe it’s one specific error in a 10,000-line log file. Or you need to find every mention of a function in a sprawling codebase. Manually scanning through this is a soul-crushing, time-wasting chore.
The Solution: Enter grep. This command is the single fastest way to search through text. It filters lines, showing you only what matches your search. Mastering grep is arguably the most essential of all time-saving Linux terminal commands. It turns hours of eyeball-searching into a split-second operation.
Time-Saving Examples & Hacks:
Let’s move beyond theory. Here’s how you use it to save real time:
The Basic Rescue:grep “Connection refused” /var/log/syslog
What it does: Instantly pulls every line containing “Connection refused” from your system log. No scrolling required.
The Process Finder (A Classic Productivity Hack):ps aux | grep nginx
What it does: Lists all running processes (ps aux) and then filters (| grep) to show only lines with “nginx”. This is the quickest way to check if a service is running and find its Process ID (PID).
The Recursive Code Explorer:grep -r “def calculate_price” /home/user/my_project/
What it does: The -r flag tells grep to search recursively through every file in the /home/user/my_project/ directory and all its subfolders. Perfect for finding where a function or variable is defined in a project.
Pro Tips to Level Up:
grep -i “error”: The -i flag makes your search case-insensitive. It will find “error”, “Error”, and “ERROR”. A must-use for messy logs.
grep -v “INFO”: The -v flag inverts the search. It shows you all lines that do NOT contain “INFO”. Incredible for filtering out noise and seeing only the important “WARN” or “ERROR” entries.
grep -A 2 -B 2 “panic”: Show After 2 lines and Before 2 lines of each match. This gives you crucial context around the error, saving you from having to open the file to see what happened just before the crash.
Why This is a Top Linux Productivity Hack for Developers:
You’re no longer passively reading logs or code. You’re actively interrogating them. grep gives you immediate answers, slashing debugging time and helping you navigate large projects with precision. It’s not just a command; it’s your first line of defense against time-consuming manual searches.
2. find – The File System Detective
The Problem: Your files have gone rogue. That one configuration file you edited last week? Vanished. Those massive cache files eating up disk space? Hiding. Clicking through folder after folder in a GUI file manager is the slowest way to track them down. You need a search that’s faster, smarter, and can act on what it finds.
The Solution: The find command. This is the terminal’s powerhouse search utility, going far beyond simple name matching. It can hunt by size, by modification date, by type, and even by permissions. Then, it can execute commands on the results. This makes it one of the most powerful time-saving Linux terminal commands in your arsenal.
Time-Saving Examples & Hacks:
Stop browsing, start finding. Here are the commands that will rescue you daily:
The Cleanup Command (A Classic Hack):find /tmp -name “*.tmp” -mtime +7 -delete
What it does: In the /tmp directory, finds all files ending in .tmp that were modified more than 7 days ago (-mtime +7) and deletes them. Automate this with cron (Command #7!) for hands-free maintenance.
The “What’s Eating My Disk?” Finder:find /home -type f -size +500M
What it does: Searches /home for files (-type f) larger than 500 Megabytes. Instantly identifies the space hogs. Use -exec ls -lh {} ; at the end to see their sizes in a human-readable format.
The Recent Project File Locator:find ~/projects -name “*.py” -mtime -1
What it does: In your projects folder, finds all Python files modified in the last 1 day. Perfect for recalling what you were just working on.
Pro Tips to Level Up:
The -exec Power Move: This is where find transforms from a detective into an enforcer.
find . -name “*.bak” -exec rm {} ; – Finds and removes all .bak files.
find . -name “*.jpg” -exec cp {} /backup/images ; – Finds all JPGs and copies them to a backup folder.
Use -type d to find directories. Great for navigating complex project structures.
The Permission Finder: find / -type f -perm /4000 2>/dev/null – Finds files with the SUID bit set (a common privilege escalation vector in security, linking back to advanced topics like those in The Pentester’s Linux Library).
Why This is a Top Linux Productivity Hack for Developers:
find turns tedious file management into a precise, automated operation. It’s the difference between manually cleaning up disk space and having a one-command solution. For developers managing source trees, build artifacts, and log files, mastering find is non-negotiable for maintaining an efficient and organized workspace. It’s not just about finding files—it’s about taking immediate action on them.
3. awk & sed – The Text Processing Power Duo
The Problem: You’re staring at a wall of text that needs to be tamed. Maybe it’s a messy CSV file, a giant log where you only need certain columns, or 100 configuration files where you need to change one setting. Doing this manually? That’s a guaranteed way to waste hours and introduce errors.
The Solution: Meet awk and sed—the terminal’s dynamic duo for slicing, dicing, and transforming text at lightning speed. These commands look intimidating but think of them as your time-saving Linux terminal commands for surgery-level text manipulation. Once you learn a few patterns, you’ll wonder how you ever managed files without them.
The Quick Distinction:
awk: The data extractor. Think “columns.” Perfect for structured data like logs, CSVs, or command outputs.
sed: The stream editor. Think “search and replace on steroids.” Great for batch editing files.
Time-Saving Examples & Hacks:
awk – The Column Wizard:
awk ‘{print $1, $3}’ access.log
What it does: Prints only the 1st and 3rd columns (like IP and timestamp) from a web server log file. Instant clarity from chaos.
ps aux | awk ‘{print $1, $4}’ | sort -k2 -nr | head -5
What it does: Shows the top 5 processes by CPU usage ($4), along with their owners. A perfect example of Linux productivity hacks for developers debugging performance issues.
sed – The Batch Editor:
sed -i ‘s/http:///https:///g’ config/*.yml
What it does: The -i flag edits files in-place. This command finds all http:// in your YAML configs and replaces them with https:// across every file in the config/ directory. One command, hundreds of files updated.
sed ‘/^#/d; /^$/d’ config.conf
What it does: Cleans a config file by deleting (d) all lines that start with # (comments) and all empty lines. Leaves you with just the active settings.
The Power Pipeline (Combining Both):
grep “ERROR” app.log | awk ‘{print $2, $5}’ | sed ‘s/[//g; s/]//g’
grep finds all ERROR lines.
awk extracts just the timestamp (2nd field) and error code (5th field).
sed strips the bracket characters [ and ] for a clean output.
Pro Tips to Level Up:
awk -F’:’: Use -F to change the field separator. awk -F’:’ ‘{print $1}’ /etc/passwd splits by colons to get just usernames.
sed -n ‘10,15p’ file: Use -n with p to print only specific lines (e.g., lines 10-15). Great for extracting sections.
awk ‘!seen[$0]++’: A magic one-liner to remove duplicate lines while preserving order—another fantastic hack for cleaning data.
Why This is a Top Linux Productivity Hack for Developers:
These tools automate what would otherwise be tedious manual editing or require writing a full script. Whether you’re reformatting data for a report, refactoring code patterns, or parsing complex logs, awk and sed give you surgical precision. They turn text processing from a chore into a superpower, saving you from countless hours of opening files and making repetitive changes by hand. Mastering even 20% of their functionality will make you exponentially more productive at the command line.
4. xargs – The Command Multiplier
The Problem: You’ve got a list—a list of files to delete, servers to ping, or URLs to download. But the command you need to use doesn’t accept that list from a pipe (|). Your options are painfully slow: run the command manually for each item, or write a throwaway script. This bottleneck kills your terminal workflow’s momentum.
The Solution: Enter xargs, the ultimate connector. Its job is simple but transformative: it takes items from standard input (like a list from find or grep) and turns them into arguments for another command. This is the cornerstone of building powerful, automated one-liners and a masterclass in time-saving Linux terminal commands.
Think of it this way: If the pipe (|) sends a stream of text, xargs converts that stream into arguments you can use.
Time-Saving Examples & Hacks:
Let’s see how this “command multiplier” automates the tedious stuff:
The Mass File Deletion (Carefully!):find ./downloads -name “*.iso” -type f | xargs rm
What it does: find creates a list of all .iso files. xargs takes that list and feeds it to rm as arguments, deleting them all in one go. Caution: Always test with echo first (e.g., … | xargs echo rm) to see what would happen.
The Parallel Ping Check (A Network Admin’s Hack):cat server_list.txt | xargs -P 5 -I{} ping -c 2 {}
What it does: Reads a list of servers. -P 5 runs 5 parallel ping processes at once, drastically speeding up the task. -I{} defines {} as the placeholder for each server name in the command. This is a prime example of Linux productivity hacks for developers working with multiple systems.
The Batch Downloader:cat urls.txt | xargs -n 1 wget
What it does: Reads a file of URLs. -n 1 tells xargs to pass only one URL at a time to wget, ensuring each file downloads correctly. Simple, effective automation.
The Non-Negotiable Pro Tip: Safety with -0
This is critical. Filenames can contain spaces or newlines, which break basic xargs usage.
The Safe Way (Always Do This):find . -name “*.log” -print0 | xargs -0 rm
-print0 (on find) and -0 (on xargs) use a null character to separate items, handling any weird filename perfectly.
The Risky Way: find . -name “*.log” | xargs rm (Could fail or delete the wrong things if a filename has a space).
Why This is a Top Linux Productivity Hack for Developers:
xargs is the glue that binds other powerful commands (find, grep) into automated pipelines. It eliminates the “copy-paste 100 times” workflow, letting you operate on dozens, hundreds, or even thousands of items with a single, safe command. It transforms the terminal from a tool for single operations into an engine for bulk actions, saving you from the monotony of repetitive tasks and turning complex operations into simple, repeatable one-liners.
5. tmux or screen – The Session Saviors
The Problem: Your SSH connection drops. You accidentally close the terminal window. Your laptop battery dies. In that split second, poof—your long-running process, complex workflow, and precious terminal history vanish. You’re left staring at a blank screen, forced to start over. For developers and sysadmins, this isn’t just annoying; it’s a massive, avoidable time sink that breaks your flow.
The Solution: Terminal multiplexers. Think of them as your terminal’s “save game” feature. Both tmux (more modern and feature-rich) and screen (older, universally available) solve this by letting you create persistent, detachable sessions. This isn’t just a convenience—it’s one of the most critical time-saving Linux terminal commands for anyone who works on remote servers or values their workflow.
The Core Benefit: You can detach from a session (it keeps running in the background) and re-attach later from any computer, picking up exactly where you left off.
Time-Saving Examples & Hacks:
The Basic Life-Saver: Never Lose a Process Again # Start a long-running task in tmux tmux new -s data_processing ./long_script.sh # Detach with: Ctrl+b, then d What it does: Your script runs safely in a named session (data_processing). Your laptop dies? No problem. SSH back in and run tmux attach -t data_processing to resume exactly where you left off.
The Multi-Tasking Workspace (A Developer’s Superpower):
In tmux, you can split your terminal into panes and organize windows.Ctrl+b % – Split vertically (you now have two panes side-by-side).Ctrl+b ” – Split horizontally.Ctrl+b c – Create a new window (like browser tabs for your terminal).The hack: Keep your editor in one pane, a build process in another, and logs in a third—all within one SSH connection. This is a foundational Linux productivity hack for developers working on remote servers.
The Collaboration Tool: Both tmux and screen allow session sharing. You can let a colleague attach to your session to pair-debug in real-time:
bash # In screen screen -S shared_session # Then have your colleague run: screen -x shared_session
Pro Tips to Level Up:
Learn the prefix key: In tmux, it’s Ctrl+b by default. In screen, it’s Ctrl+a. This is your gateway to all commands.
tmux session management: Use tmux ls to list sessions and tmux kill-session -t name to clean up.
Scrollback: In tmux, press Ctrl+b then [ to enter copy mode and scroll through massive outputs with your arrow keys.
Why This is a Top Linux Productivity Hack for Developers:
This changes your relationship with the terminal from temporary to permanent. You stop worrying about network stability or accidental closures. You build persistent, organized workspaces for different projects (tmux session for “web_app”, another for “database_work”). It eliminates the constant re-navigation and re-typing that eats away at your day, making it arguably the single biggest workflow upgrade among all time-saving Linux terminal commands. For those delving into complex system work (like penetration testing, where sessions are critical), mastering these tools is non-negotiable—a skill covered in depth in resources like The Pentester’s Linux Library.
6. rsync – The Smart Synchronization Expert
The Problem: You’re copying huge directories with cp and it’s taking forever. Your backup script transfers everything every time, wasting bandwidth and time. You’ve got a web project on your laptop that needs to go live on a server, and manually tracking changed files is error-prone. There has to be a better way than brute-force copying.
The Solution: Meet rsync—the “smart sync” command. It doesn’t just copy; it synchronizes. Its genius lies in only transferring the differences between source and destination. It’s one of the most efficient time-saving Linux terminal commands for backups, deployments, and moving data anywhere.
The Core Advantage: After the first run, subsequent syncs are lightning-fast because rsync only moves what’s changed (by checking file size and modification time, or using delta-transfer algorithms).
Time-Saving Examples & Hacks:
The Flawless Local Backup: rsync -av /home/me/projects /backup_drive/ What it does: The -a flag preserves permissions, timestamps, and uses recursion. -v shows you what’s happening. This creates a perfect mirror of your projects folder. Run it daily, and only new/changed files will transfer.
The One-Way Live Server Deploy (A Developer’s Go-To Hack):rsync -avz –delete ./dist/ user@server:/var/www/mysite/What it does:
-z compresses data during transfer.
–delete removes files on the server that are no longer in your local ./dist/ folder, keeping the destination an exact mirror.
This is a quintessential Linux productivity hack for developers for deploying static sites or application builds.
The “Resume-able” Big Transfer (The Hero Flag):
bash rsync -avzP /path/to/bigfile user@remote:/destination/
What it does: The -P flag combines –progress (shows a progress bar) with –partial (keeps partially transferred files). If your SSH connection drops, just re-run the same command, and rsync will pick up where it left off. This eliminates the frustration of restarting huge transfers from scratch.
Pro Tips to Level Up:
The Dry Run (-n): Always test first! rsync -avn source/ destination/ shows what would happen without moving any data. Prevents nasty surprises.
Exclude the Junk: Use –exclude=’node_modules’ or –exclude=’*.tmp’ to skip unnecessary directories/patterns. You can also list exclusions in a file and use –exclude-from=file.
Bandwidth Limiting: Need to sync during work hours? Use –bwlimit=5000 to limit transfer speed to 5000 KB/s (about 40 Mbps) to be a good network citizen.
Why This is a Top Linux Productivity Hack for Developers:
rsync transforms data transfer from a slow, wasteful operation into a precise, incremental update. It’s the engine behind efficient backup routines, seamless code deployment, and safe data migrations. The time savings compound massively—instead of transferring 100GB for a small change, you might transfer only 10MB. For professionals who need robust, reliable file operations—whether as a sysadmin, a developer, or a security practitioner (where securely moving data is key, as explored in resources like The Pentester’s Linux Library)—mastering rsync is non-negotiable. It’s not just a command; it’s a workflow upgrade.
7. cron – The Automated Task Scheduler
The Problem: You have tasks you run on a loop. Every Monday, you manually back up a folder. Every day at 5 PM, you run a script to clean up temp files. At the start of each hour, you check a system health metric. This isn’t just boring—it’s a guaranteed way to forget, make mistakes, and lose chunks of your schedule to repetitive admin work.
The Solution: The cron daemon. It’s the silent, built-in timekeeper of your Linux system. You tell it what to run and when, and it handles the rest, perfectly, forever. This is the ultimate “set it and forget it” automation tool and one of the most powerful time-saving Linux terminal commands for systematizing your workflow.
How it Works: You edit a special file called your crontab (cron table). Each line is a single job with a simple timing syntax, followed by the command to run.
Time-Saving Examples & Hacks:
Let’s automate the repetitive stuff so you never have to think about it again.
The Daily Personal Backup (The Classic): 0 2 * * * /usr/bin/rsync -a /home/me/docs /backup/daily/ What it does: Runs at 2:00 AM every day. It silently syncs your documents to a backup drive using rsync. Wake up to a backed-up system.
The Weekly System Cleanup (A Maintenance Must-Do): 0 4 * * 1 /path/to/cleanup_script.sh What it does: Runs at 4:00 AM every Monday (1 represents Monday). It executes a script that clears cache, removes old downloads, or prunes Docker images. This is a core Linux productivity hack for developers to keep their systems lean.
The Every-Minute Monitor (For Active Development/Testing):
bash */5 * * * * /usr/bin/curl -s http://localhost:3000/health > /dev/null || systemctl restart my_app
What it does: Checks your web app’s health endpoint every 5 minutes. If the check fails (curl exits with an error), it restarts the app service. A simple, effective auto-healing monitor.
The Crontab Syntax Cheat Sheet:
* * * * * command_to_execute
┬ ┬ ┬ ┬ ┬
│ │ │ │ │
│ │ │ │ └── Day of the Week (0 – 7, where 0 and 7 = Sunday)
│ │ │ └─────── Month (1 – 12)
│ │ └──────────── Day of the Month (1 – 31)
│ └───────────────── Hour (0 – 23)
└────────────────────── Minute (0 – 59)
Example: 30 14 * * 1-5 = “At 2:30 PM, on every day-of-week from Monday through Friday.”
Pro Tips to Level Up:
Edit Your Crontab Safely: Always use crontab -e. Never edit the system files directly unless you’re managing system-wide jobs.
The Path Problem: Cron runs with a minimal environment. Always use full paths to commands (/usr/bin/rsync) and scripts. A job that runs fine in your terminal may fail in cron due to this.
Capture Output for Debugging: By default, cron emails output to you. To log it to a file, append >> /path/to/logfile.log 2>&1 to your job line.
Test with a One-Minute Job: Before setting your real schedule, test with * * * * * to make sure the command works as expected in the cron environment.
Why This is a Top Linux Productivity Hack for Developers:
cron transforms you from an operator into an architect. You define the rules once, and your system maintains itself. It saves you not just the time of running the tasks, but the mental energy of remembering to do them. For any serious developer or sysadmin, it’s the backbone of maintenance, deployment pipelines, and data processing. Mastering cron, along with understanding system-level job scheduling (like systemd timers), is a fundamental skill for Linux mastery—a natural progression after learning the core commands, and a topic explored in depth for those managing complex systems in resources like The Pentester’s Linux Library.
8. tar in Combination with gzip/bzip2 – The Archiving Ace
The Problem: You need to bundle a whole directory for backup, email it to a colleague, or upload it to a server. Your instinct might be to reach for a clunky GUI tool or create a messy ZIP file that doesn’t preserve Linux permissions. Next comes the tedious cycle of right-clicking, waiting for compression, then maybe having to log into a server and decompress it all over again. It’s a simple task made inefficient.
The Solution: The tar command (Tape ARchive) is your one-stop shop for bundling and compressing. Paired with gzip or bzip2, it creates the ubiquitous .tar.gz or .tar.bz2 files that are the standard of the Linux world. Mastering these one-liners is a fundamental time-saving Linux terminal command that streamlines sharing, backup, and data transfer.
The Magic is in the Flags: You don’t run separate commands. tar uses flags to handle compression/decompression in one go.
Time-Saving Examples & Hacks:
Memorize these two patterns. They’ll cover 95% of your needs.
The Create Command (The Backup Power Move):tar -czvf project_backup.tar.gz /home/user/my_project/What it does:
-c: Create an archive.
-z: Compress it with gzip (use -j for bzip2).
-v: Be verbose (show progress).
-f: Specify the filename.
This creates project_backup.tar.gz, perfectly preserving the entire structure and permissions of my_project/.
The Extract Command (The Quick Unpack):tar -xzvf downloads/archive.tar.gzWhat it does:
-x: Extract the archive.
The other flags (z, v, f) work the same way.
It decompresses and unpacks everything in one step, right in your current directory.
The “Just Peek Inside” Hack (A Developer’s Timesaver):
bash tar -tzf archive.tar.gz | grep “config”
What it does:
-t: List the contents.
This lets you view the archive’s contents without extracting it. Piping to grep lets you quickly find if a specific file is inside. This is a classic Linux productivity hack for developers dealing with downloaded source code or data bundles.
Pro Tips to Level Up:
Choose Your Compression: Use -z (.tar.gz) for a good balance of speed and compression. Use -j (.tar.bz2) for slightly better compression on text-heavy archives (like source code), though it’s slower.
Exclude Files on the Fly: Use –exclude=’node_modules’ or –exclude=’*.tmp’ while creating an archive to keep it lean.
Extract to a Specific Directory: Add -C /target/path before the archive file: tar -xzvf archive.tar.gz -C /opt/. No more messy cleanup after extracting in the wrong place.
For Security & Forensics: Creating clean archives of logs, evidence, or configuration directories is a routine task in security work. Understanding how to preserve permissions and metadata with tar is crucial, a skill emphasized in resources like The Pentester’s Linux Library for creating reliable forensic bundles.
Why This is a Top Linux Productivity Hack for Developers:
You move from a multi-step, point-and-click process to a single, precise command that works consistently everywhere—on your laptop, on a remote server over SSH, or in automation scripts. It’s faster, it’s more reliable, and it integrates seamlessly with other commands (like using find to locate files to archive). Knowing tar fluently means you spend zero mental energy on the mundane task of packing and unpacking data.
9. ssh & scp – The Remote Access Lifeline
The Problem: You need to run a quick command on a server, edit a config file, or transfer some data. Firing up a separate GUI client, dragging and dropping files, or dealing with clunky web interfaces breaks your flow. Every minute spent logging in and navigating inefficiently is a minute stolen from real work.
The Solution: ssh (Secure Shell) and scp (Secure Copy). These aren’t just tools; they’re your instant, encrypted tunnel to any other Linux machine. They turn remote management and file transfer into a seamless part of your terminal workflow, making them indispensable time-saving Linux terminal commands.
The Core Idea: With one command, your local terminal becomes a window into a remote machine. No extra software, no disruptive context switching.
Time-Saving Examples & Hacks:
The Instant Server Login: ssh user@192.168.1.100 What it does: Connects you to the server at that IP address. You’re now working directly on it. This is the foundational skill.
The “One-Liner” Remote Command (A Game-Changing Hack): ssh user@host ‘sudo systemctl restart nginx && tail -f /var/log/nginx/error.log’ What it does: Executes commands without opening an interactive shell. Restart the Nginx service and immediately tail the error log—all in one line from your laptop. This is a quintessential Linux productivity hack for developers managing multiple servers.
The Seamless File Transfer (No GUI Needed):
bash # Copy a file TO the server scp backup.tar.gz user@host:/remote/backup/ # Copy a file FROM the server scp user@host:/var/log/app.log ./local_logs/ # Copy an entire directory (use -r for recursive) scp -r ./dist/ user@host:/var/www/html/
The Non-Negotiable Pro Tip: SSH Keys (Your Passwordless Passport)
Typing passwords every time is the antithesis of saving time. Set up SSH key authentication.
Generate a key pair (on your local machine):
bash ssh-keygen -t ed25519
(Just press Enter through the prompts to accept defaults).
Copy your public key to the server:
bash ssh-copy-id user@host
After this, ssh and scp connect instantly and securely without a password prompt. This single setup saves countless hours over a year.
Pro Tips to Level Up:
The SSH Config File (~/.ssh/config): Stop memorizing IPs and usernames.
bash Host myserver HostName 192.168.1.100 User deploy IdentityFile ~/.ssh/id_ed25519
Now just type ssh myserver. This is a massive time-saving Linux terminal command when managing many hosts.
SCP with Compression: For large files, add the -C flag: scp -C large_file.iso user@host:/backup/.
Tunnel Through a Jump Host: Use ssh -J jump_host user@final_host to seamlessly connect through a gateway server—a common scenario in corporate or cloud networks.
Why This is a Top Linux Productivity Hack for Developers:
ssh and scp eliminate the barrier between your local environment and remote infrastructure. They enable rapid debugging, instant deployment, and streamlined server management without ever leaving your keyboard. Combined with a tool like tmux (Command #5), they create an unstoppable, persistent remote workspace. For professionals who work across systems—especially in fields like DevOps, cloud engineering, or security (where remote access and data exfiltration techniques are critically examined, as in The Pentester’s Linux Library)—mastering these commands is not optional. They are the lifeline of modern, efficient system administration.
10. history & Ctrl+R – Your Personal Command Library
The Problem: You know you ran that perfect three-command pipeline to parse logs last week. You just used that specific rsync command with all the right flags. But now? It’s gone, lost in the fog of a thousand terminal entries. Retyping complex commands from memory is slow and error-prone. This mental scavenger hunt wastes more time than you realize.
The Solution: Your terminal isn’t just executing commands; it’s recording them. The history command and the Ctrl+R shortcut give you instant access to everything you’ve ever run—turning your terminal history into a searchable, reusable knowledge base. This might be the simplest yet most profound of all time-saving Linux terminal commands.
The Core Idea: Stop retyping. Start recalling.
Time-Saving Examples & Hacks:
The “What Was That Command?” Saver: history | grep rsync What it does: Searches your entire command history for any line containing “rsync”. Instantly surfaces that perfect backup command you crafted but forgot. This alone makes it a top-tier Linux productivity hack for developers.
The Magic Reverse Search (Ctrl+R):
Press Ctrl+R.
Start typing any part of a past command (like “scp”).
Keep pressing Ctrl+R to cycle through matches.
Press Enter to execute or Right Arrow to edit it.
Why it’s genius: It’s fuzzy, fast, and lives right under your fingers. No need to break your keyboard flow.
The Quick-Repeat Shortcuts (Muscle Memory Savers):
!! – Re-run the last command. Perfect when you forget sudo: sudo !!
!$ – Re-use the last argument from the previous command.
bash tar -czvf project_jan.tar.gz /home/projects/alpha scp !$ backup_server:/backups/ # !$ becomes /home/projects/alpha
Pro Tips to Level Up:
Increase Your History Size: By default, Bash only remembers the last 500 commands. Add these lines to your ~/.bashrc to keep thousands:
bash export HISTSIZE=10000 export HISTFILESIZE=20000 export HISTTIMEFORMAT=”%F %T ” # Adds timestamps to `history`
Search History with a Pattern: Use ! followed by the start of a command. Typed !ssh and hit Enter will re-run your last command that began with ssh.
The “Historyless” Command: Prepend a command with a space (if HISTCONTROL is set to ignorespace) to keep it out of your history—useful for sensitive commands with passwords.
For Security Pros: Command history is forensic gold. Knowing how to analyze, sanitize, and leverage it is critical in security assessments—a concept explored in depth in resources like The Pentester’s Linux Library.
Why This is the Ultimate Time-Saving Linux Terminal Command:
It’s the force multiplier for all the other nine commands. history and Ctrl+R ensure you never lose a valuable command. They compound your learning and efficiency, turning one-off solutions into permanent parts of your toolkit. The time saved isn’t just in avoiding retyping—it’s in preserving your hard-won knowledge and maintaining your workflow’s momentum. It’s the final, critical hack that ensures all the other Linux productivity hacks for developers stick around to save you time again and again.
Putting It All Together: The Power of the Pipe (|)
Here’s the secret sauce: none of these time-saving Linux terminal commands work in isolation. Their true power emerges when you connect them using the humble pipe symbol: |.
Think of the pipe as a conveyor belt between machines. It takes the output of one command and feeds it directly as the input to the next. This lets you build sophisticated data processing pipelines right in your terminal, turning complex tasks into elegant one-liners.
The Magic Formula:
command1 | command2 | command3 | … > final_result.txt
A Real-World Example: The Log Analysis Pipeline
Let’s say you need to analyze a web server log to find the top 5 most frequent error types in the last hour. Doing this manually would take forever. With pipes, it’s one command:
grep “$(date -d ‘1 hour ago’ ‘+%d/%b/%Y:%H’)” access.log | grep ” 5[0-9][0-9] ” | awk ‘{print $9}’ | sort | uniq -c | sort -nr | head -5
Let’s break down this pipeline—a perfect example of Linux productivity hacks for developers:
grep “$(date …)”: Filters logs to only the last hour using a dynamic timestamp.
grep ” 5[0-9][0-9] “: Finds only server error responses (status codes 500-599).
awk ‘{print $9}’: Extracts just the status code column.
sort: Alphabetically sorts the codes (prepares for counting).
uniq -c: Counts occurrences of each unique code.
sort -nr: Sorts the counts numerically in reverse (highest first).
head -5: Shows only the top 5 results.
What would take minutes (or hours) of manual searching becomes instant insight.
Why This Changes Everything:
The pipe transforms your terminal from a command executor into a data processing workshop. You’re not just running commands—you’re designing workflows that:
Eliminate intermediate files: No more saving partial results to temporary files.
Build complex operations step-by-step: Test each piece of your pipeline as you build it.
Create reproducible analyses: Save these one-liners as scripts or aliases for future use.
This composability is what makes the command line uniquely powerful. Each of the 10 commands we’ve covered becomes a specialized tool in your workshop. grep filters, awk transforms, sort organizes, xargs multiplies—and the pipe connects them all.
Start Small, Then Scale:
Begin by chaining two commands: ls -la | grep “Jan”. Then add a third: ls -la | grep “Jan” | wc -l. As you grow more comfortable, you’ll naturally build more sophisticated pipelines that save you hours every week.
Mastering the pipe is the ultimate time-saving Linux terminal command because it unlocks the collective power of every other command in your toolkit. It’s where individual productivity hacks evolve into a complete, efficient system for getting things done.
Conclusion: Invest Minutes to Save Hours
Let’s be honest—learning new commands can feel like a detour when you’re busy. But what we’ve covered here isn’t academic knowledge; it’s practical leverage. Each of these time-saving Linux terminal commands is a shortcut that pays dividends every single time you use it.
The minutes you invest today in mastering grep, find, or tmux will save you hours next month. These Linux productivity hacks for developers compound. A command that saves you 30 seconds, used 20 times a week, gives you back 10 hours a year. Multiply that by ten commands, and you’re reclaiming serious time for meaningful work—or a well-deserved break.
Start small. Don’t try to learn all ten at once. Pick one command this week—maybe grep for searching or rsync for backups—and use it intentionally. Notice where you’re doing things manually and ask: “Could one of my new commands handle this?”
The command line isn’t about memorization; it’s about building a mindset. A mindset where you automate the repetitive, interrogate data directly, and orchestrate workflows with precision. This is the skill that separates casual users from true power users.
Your terminal is waiting. Start with one command, save your first hour, and join the community of developers who work smarter, not harder. The time you’ll save is the best investment you’ll make all week.
No Responses